
Hey my fabulous crafty friends! Sherry here with a beautiful, color filled layout using a variety of mediums and techniques. Today I will be featuring magicals, molding paste and gesso, so dig into your stash and play along!
First here is the full layout.

Lets get started,

NOTE: I left the barcode strip on because, I like to wrap it around my chipboard backing once the spray is dry.


At this point I adhered the paper to a 12x12 piece of chipboard using matte gel medium. I find that using gel medium, as opposed to tape adhesive, on the entire chipboard piece helps to prevent bubbles and buckling in the paper. I folded the barcode strip under the chipboard and adhered it onto the back, this also helps me to keep note of the paper used, for future reference.
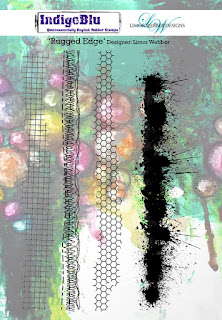
Next up are my most used most loved stamps, my Limor Webber Designs Rugged Edge border stamps from IndigoBlu. I adore these because they are so versatile. They can be hard and distinct or soft and subtle! Keeping in mind where my photo will be placed at the end, I made impressions of the border stamps using black ink. I wanted the images to be crisp, clean and distinct.

One of my new fav mediums was up next. Magicals have found their way into my heart and have been a staple in a lot of my recent projects. They are so versatile and can be used in so many ways, today I will sprinkle and use water to create drips and layers!
I used a variety of magical colors (Rusty Lantern, Summer Lovin Sun, T-Bird Turquoise and Shabby Turbine Teal) to create a ton of layers, color drips and blending. I started with my lightest colors and worked my way darker. I also did a lot of layers before I was happy. Starting with that lightest color I sprinkled it onto the horizontal plane along the centre of the page, then I sprayed it with water and tilted the paper to allowed it to drip both up and down the page. Allow your page to completely dry between each layer of color. I find that as you add colors, vibrancy increases.

Keeping with some simple, neutral colored flowers of soft blues and yellows, I layered a few along each side of the banner. A few of the small flowers have wire stems so I curled them around a paintbrush handle and let them stick out from the edges of the arrangement.

Sprinkle the same magical colors onto the flowers and a bit onto the molding paste on the banner. Then spray with water. Allow them to bleed and blend into each other. Again wait for them to dry. I applied a second layer of magical color to increase the vibrancy of the tones.
VOILA layout complete! Here are a few close ups of this little gem!


Thank you so much for stopping in and checking out my tutorial. For more inspiration and to follow along other tutorials and layouts check out my blog, facebook and instagram. Also make sure to peruse the DT inspiration blog for more tutorials and amazing inspiration!
Oh ya, your husband called, he says go shopping... HERE :)
Supplies:
- Lindy's Stamp Gang: Limor Webber Designs Sprays: Time Travel Teal and Bonjour Butter
- Lindy's Stamp Gang: Magicals: Rusty Lantern Lime, Shabby Turbine Teal, Summer Lovin Sun and T-Bird Turquoise
- IndigoBlu Limor Webber Designs Rugged Edge stamp set
- 7DotsStudio: Thoughts Keeper paper (#SDPP0115)
- Amy Tangerine: Thickers (#366337)
- Prima Marketing: 'Weaving' Stencil (#962333)
- Epiphany Flowers (#578824)
- Firebird flower (#566470)
- Rodanthe Seaboard flowers
- Golden: molding paste
Fantastic layout - I love all the color and texture. You really have a way with these Magicals. Thank you for the inspiring me today.
ReplyDeleteThat background is AMAZEBALLS! love the end result xx
ReplyDelete